Step-by-Step
The following step-by-step description shows how to use the RapidStart functionality for LS Nav.
- Start with a new Company.
- Empty Database
- Create Permissions and Users as required
-
Run RapidStart Services Wizard.
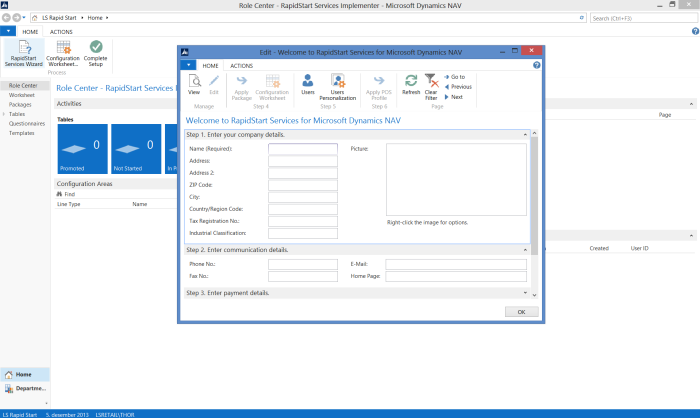
- Enter relevant information for the first three steps of the Wizard.
-
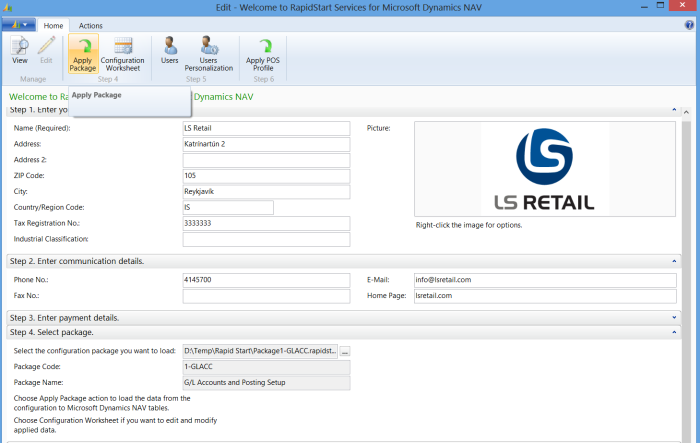
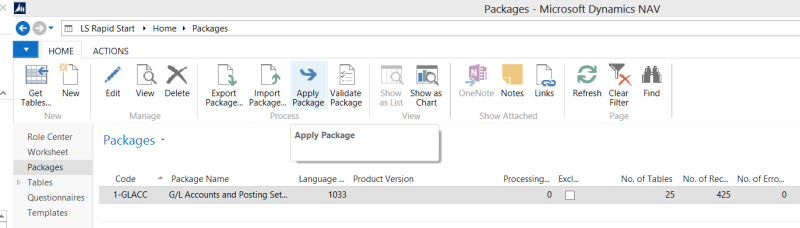
Go to step four of the Wizard and select the first Package (Package1-GLACC) and apply the package and details.
-
Go to step six of the Wizard and select the DefaultProfile.xml document included in the LS RapidStart release.
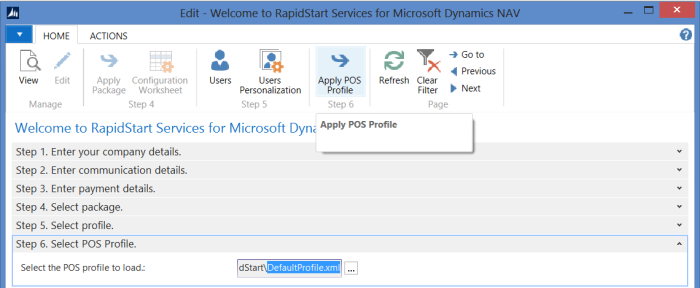
Click Apply POS Profile and wait for the process to finish.
- Click OK to close the RapidStart Wizard.
-
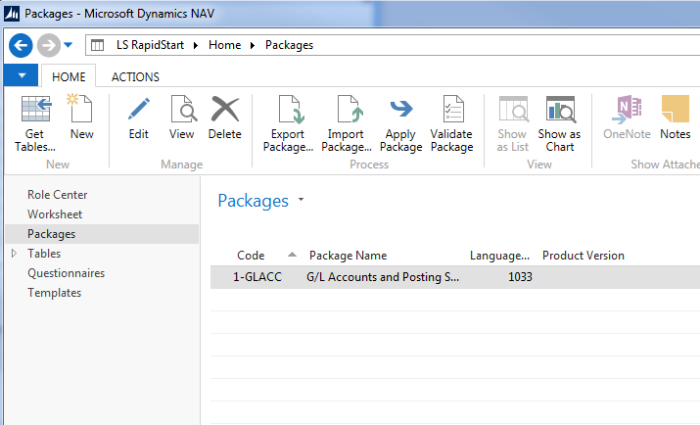
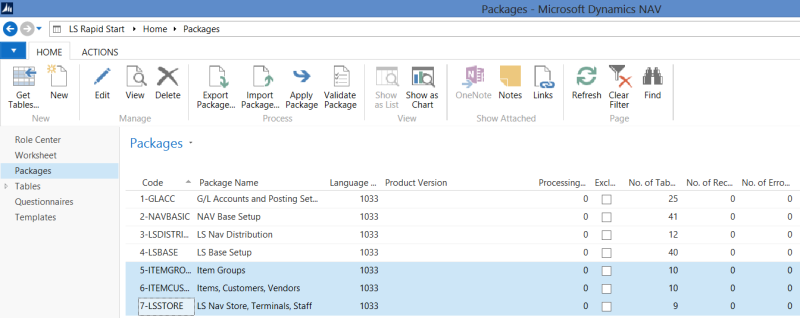
Select Packages in the left navigation bar.
-
Import Rapid Start Packages 2 - 8 one by one in sequential order.
After each import, apply the package data by clicking Apply Package on the Home action menu.
By doing this the actual Data is moved from the temporary RapidStart tables to the actual Nav receiving tables and the RapidStart Worksheet with definitions of data is populated.
-
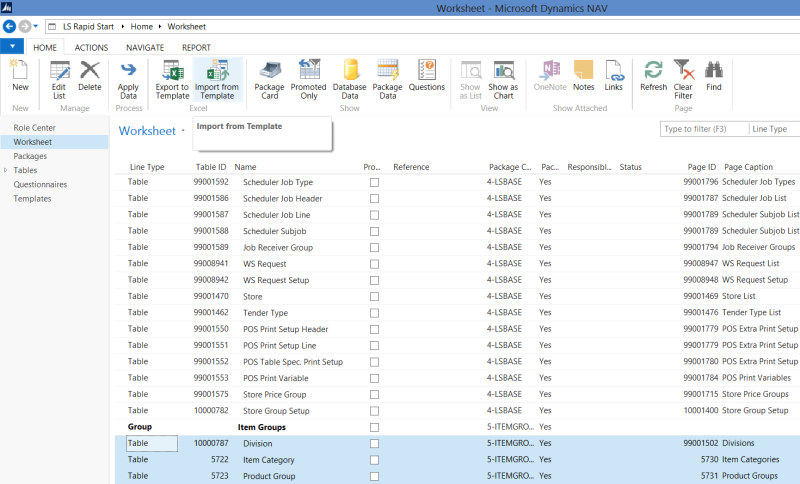
Imported Data can be viewed by going through the RapidStart Worksheets.

Through this page it is possible to see which tables are related to each Package as they are Grouped together and include a Column revealing the “Package Code.”
-
For Packages 5, 6, 7 and 8 data is imported from Excel sheets provided with the release. Customer data should be populated or entered into these Documents.
-
The Excel sheets are imported through the Worksheet page.
Before Importing from Template, relevant Tables should be selected (highlighted).Note: When the Excel documents are imported, the documents from Item Groups (Package 5) need to be taken first, before the documents for Items, Customers and Vendors (Package 6).
Finish the Import from Template process.
Apply the data by clicking Apply Data on the Home action menu.
-
- Unfortunately, RapidStart tools can not handle system tables, so data needs to be entered manually into them. One of these tables is the Web Service table, ID 2000000076. The final thing you need to do is to enter data manually into this table.
- Now you should be able to start using LS Nav.
Tip: Even though items can be sold on the POS and statements posted based on the RapidStart framework, additional setup is to be expected. This includes setup for offline POS terminals, inventory management and more.